
Hello everyone! I have a cute and textured Sizzix tutorial to share with you today, featuring an owl mom and her two babies.

I love owls and started a small owl collection when I was a teenager, making a whole bunch of them myself in polymer clay. So I knew I wanted Lori Whitlock's Owl #5 die when I saw it and I was happy to also find an owlet, in the Fox & Owl Sentiment set. For this canvas, I went for natural colours, but lots of textures and used various interesting materials, so that the viewer would want to reach out and touch the canvas.

Start by die cutting the owl from white mat board, and repeat cut various parts of its body from different surfaces. The head and the top pair of wings were die cut from a piece of mat board to which I had glued Tim Holtz Eclectic Elements fabric. The body was die cut from one of the Textile Surfaces and the second pair of wings from burlap from Textured Surfaces. The larger eyes were die cut from white Paper Leather and the smaller eyes from mat board. The beak was die cut from cork. Mix and match surfaces you have at hand and it is a great way to use up scraps.

Adhere the Textile Surface to the body and glue lace trim on top with a glue stick.
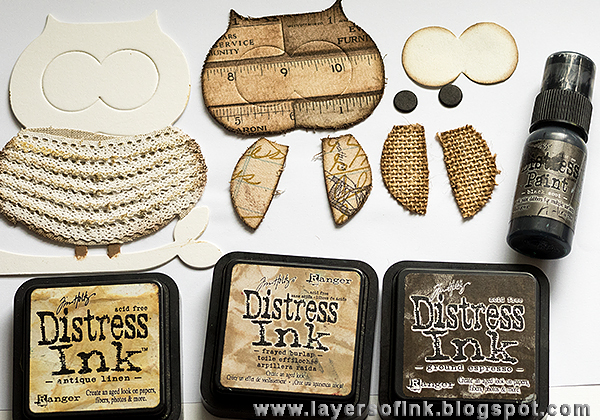
Ink all the pieces and paint the eyes with black paint.

I dyed a piece of cheesecloth with Antique Linen and Ground Espresso Distress Spray Stains (forgot to take a photo of that step) and used a little bit at the top of the owls head. Piece the owl together. For the eyes, I also used Tim Holtz Sprocket Gears. The irises was given a highlight with a white pen and were then coated with Glossy Accents. I also gave her Game Spinner eyebrows.
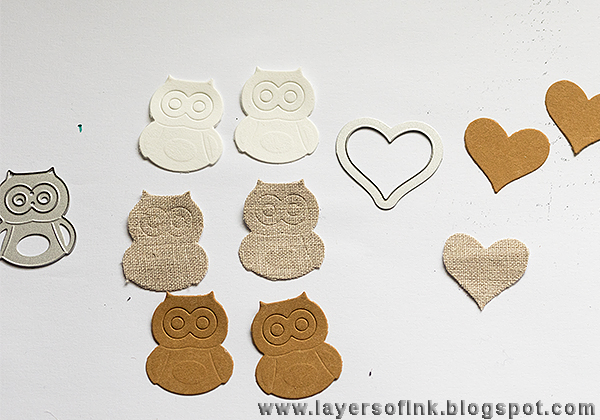
Die cut the owlet from the Fox & Owl Sentiments set from white Paper Leather, Textile Surfaces (you might need to use scissors to snap some off some of the threads after die cutting) and brown Paper Leather. Die cut the heart from the same set.

You need these pieces for the owlet, in this order. The irises were painted black, but it might be easier to die cut them from black paper. The first white owl is mainly there to give stability to the owl, you don't actually see it.

Layer the owlets, starting with the white piece and then the Textile Surface. Tease out small pieces of dyed cheese cloth and place under the eyes and on the tummy. Add highlights to the eyes, as before, and coat with Glossy Accents.

Coat a 6 x 8 in canvas board with gesso using a palette knife.
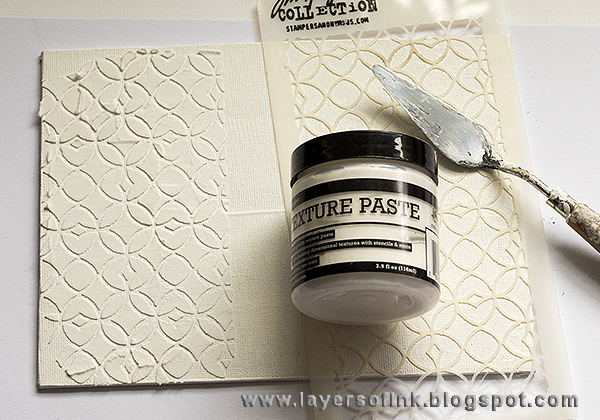
When the gesso is dry, add texture with the Latticework stencil and white Texture Paste. You need to wait until the paste is dry before you can continue with the next application, until the whole canvas is covered.

When the paste is dry, paint the canvas with slightly watered-down Distress Paint. I also added Ground Espresso, you don't see that one on the photo.

When the paint is dry, add texture by randomly stamping the background with the Tim Holtz Newsprint stamp.

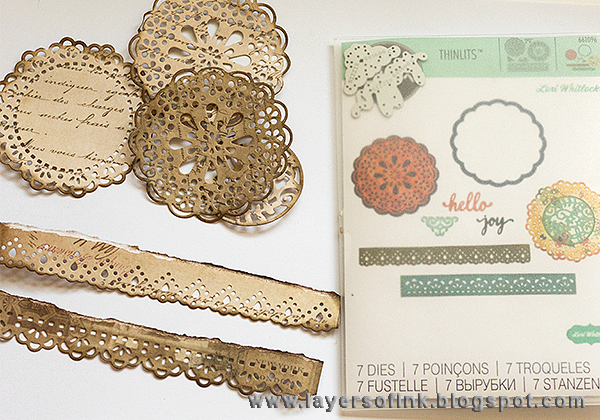
Next, die cut two branches with the Garden Greens die, from grungeboard.

Paint them with Antique Linen.

Sand to remove some of the paint and then ink with Ground Espresso. This gives the branches and leaves a cool texture.


I hope you liked this tutorial and thank you so much for stopping by today!!
Happy crafting!!
Anna-Karin
Supplies:


Gorgeous , those owls are so adorable . Tracy x
ReplyDeleteThis is absolutely amazing, Barbara! I love all the texture and those owls are the cutest.
ReplyDeleteCathie ♥
ADORABLE. INCREDIBLE. YUMMY. A TOTAL DELIGHT. Thank you for the huge smile Anna-Karin. Love your creativity! Xj.
ReplyDeleteThank you so much Joi, for those kind words!!
DeleteSo cute and sweet and a tutorial as well.....Awesome
ReplyDeleteAwesomeness!!!
ReplyDeleteThis owl family is so lovely! I love that you used so many different materials but all in natural colours! Fabulous canvas!
ReplyDeleteBut how adorable this panel?! Great, cute and original!
ReplyDeleteSuch a lot of fun time got into this! Stunning textures and great to see so many shades of brown! A piece that is one to enjoy a long time! Hope you have a sunny day!
ReplyDeleteYour owls are delightful! You have put such personality into them, I want to reach out and touch. They are adorable! One thing, though. I can't enlarge your photos on my phone and wish I could so I could see even more detail. Is it just my phone? I don't own a computer.
ReplyDeleteHi Marci! Thank you so much!! I checked it out quickly. On my phone I can enlarge the photos in the web version, but not in the mobile version. See if it works if you click 'see web version' at the bottom of the post. I hope that works. Thank you for letting me know! / Anna-Karin
Delete'View web version'
DeleteOh thank you! It worked. Now I need to go back and look at all your old posts on the web version. That will take quite awhile :-))
ReplyDeleteI am glad it worked Marci! There might be another way, but I haven't figured it out yet (the keyboard of my computer stopped working).
DeleteHi Ana-Karin,
ReplyDeleteI have not much time sadly to visit you very often.. But seeing this on FB or IG (I can't remember), couldn't resist to read your tutorial and look at your canvas in details.. This is super cute!!!!!! Totally adorable :)
Thanks for the tute, great as usual.
Happy week-end to you and family, hugs Coco X
How cute, I love this project!
ReplyDeletelove owls...this is one of the best I have seen. great step by atep too. :-)
ReplyDeletelove owls...this is one of the best I have seen. great step by atep too. :-)
ReplyDelete