Hello friends! As you might know, I love to make little houses, and I keep adding to my collection of houses. A few days ago we walked around in the Old Town of Stockholm, which is really beautiful and today's set of three houses were inspired by that. It's a
Sizzix tutorial.
I was so happy to see that there are even more house dies added to Tim Holtz Sizzix Village collection. Today I used the Village Brownstone die, which makes a tall narrow house, perfect for my purposes. I also used the new Village Rooftops and Village Bungalow dies, as well as the original Village Dwelling. These houses are easy to make and I didn't add so many details, since I wanted them to remain quite simple.
In the
Old Town you have a lot of very narrow medieval alleyways (sometimes you can reach across them), cobbled streets, and old buildings. Most of the houses have a smooth finish in various warm colours; orange, yellow, brown and red. I have a lot of photos from Old Town, this particular one was taken on
Stortorget (the Big Square), just to give you an idea of what it looks like.
Here you can see the houses and alleyways, straight from the front. These were such fun to make.
I started by die cutting the
Village Brownstone three times from patterned paper pad covers, which are the perfect weight for this die. As you can see, I die cut two pieces without the arched window/door, for the red house, for the sake of variation. They were coated with gesso and when dry, painted with Distress Paints. When the paint was dry, I added some dry-brushing and finally a coat of Vintage Distress Collage Medium, which gave them a great matte old look.
The houses were stamped in just a few places with a crack stamp from the
Ultimate Grunge set,
The roofs were and chimneys were die cut from kraft-core cardstock. Two of the roofs were dry embossed and sanded. For the third one, I die cut one of the patterns from the
Village Rooftops die. There are three patterns on the die.
The window frames, door and doorstep were also die cut from kraft-core cardstock. The shutter windows and the small window are from the
Village Bungalow die. (The Village Bungalow was initially called 'Village Cottage', so if you see that name, don't be confused, it is the same die). The door and doorstep come from Village Dwelling, and the rest of the frames you'll find on the Village Brownstone. Sand all of them.
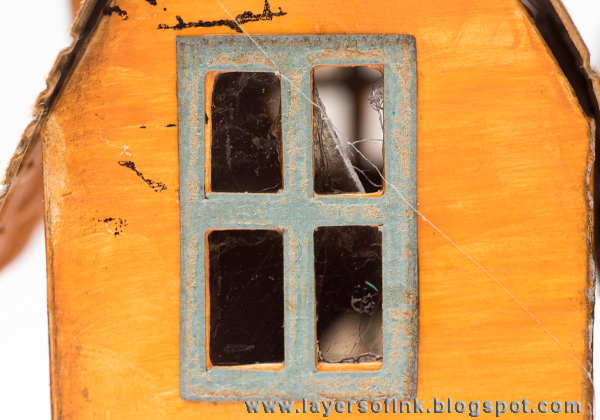
I like to always add windows to my houses and my favourite surface for that is mica. If you don't have mica, you can get a similar effect with acetate and alcohol ink.
For the base, I cut a piece of mat board and coated it with a thin layer of Paper Mosaic Grout (I wish the Grout came in a larger bottle too, separate from the Mosaic kit, since it is a really cool texture).
The grout was painted with Hickory Smoke and, when dry, dry-brushed with Black Soot.
It is easy to assemble the houses. First glue the mica to the inside of the windows, and add lace curtains if you'd like. Adhere the side flaps of the one part of a house to the other part of the house. And then adhere the second flap.
Once the body of the house is assembled, apply glue to the flaps at the top of the house and position the roof on top. You can press the inside of the flap, to make sure it sticks well.
If you see any joints, add some black paint. Here you can see the lace curtains through the windows.
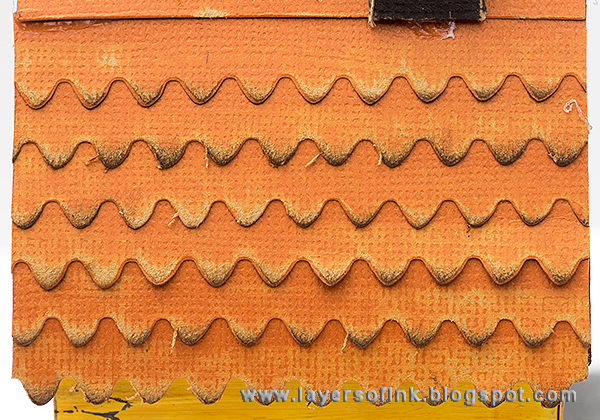
To assemble this roof, first sand and ink the pieces, then start from the bottom and work your way up. Try to make sure that the tiles are not perfectly lined up - this is easy since the strips are a little wider than the roof. Trim the sides with a craft knife.
The chimneys are glued to the roof by applying glue on the two flaps. I left one house without a chimney and gave the middle one two.
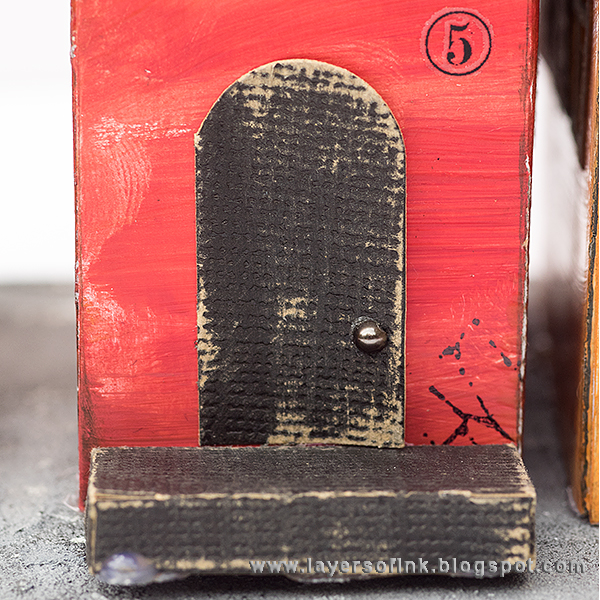
The door was glued to the front of the red house and the doorstep placed underneath. I also gave the houses rub-on numbers. A house always needs a number.
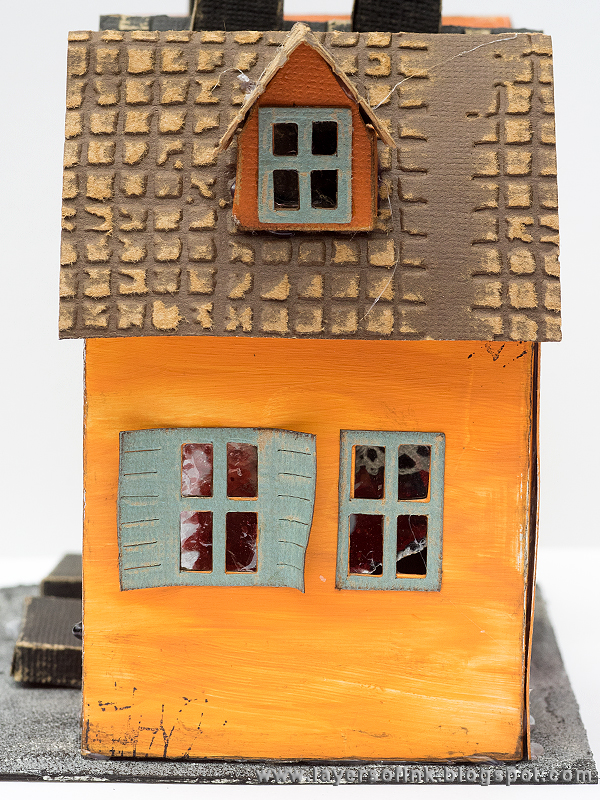
I really love the little nook that comes on the Village Bungalow die and you can use it to change the look of the Village Dwelling too. I die cut it from kraft-core and added to just the one side of the roof of the orange house.
It also comes with its own little roof, and a smaller window frame.
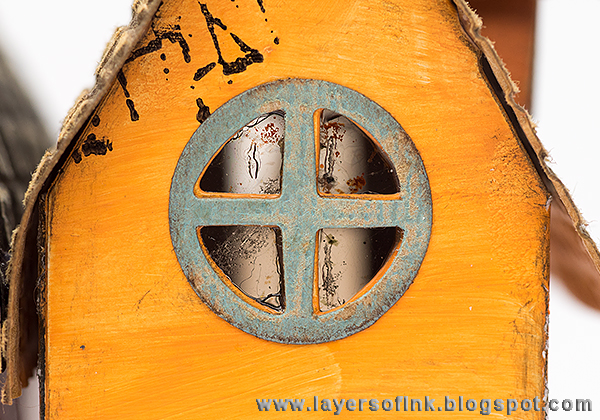
This little circle window is so cute! And because there are windows on all the sides of the house, you can see light through the houses.
The long arched window/door is also such a nice detail. Since I wanted mine to be a door, I added a pearl handle.
The houses were glued to the board, leaving almost no space between the orange and red one, and a little more between the red and the yellow one. This is the back of the houses.
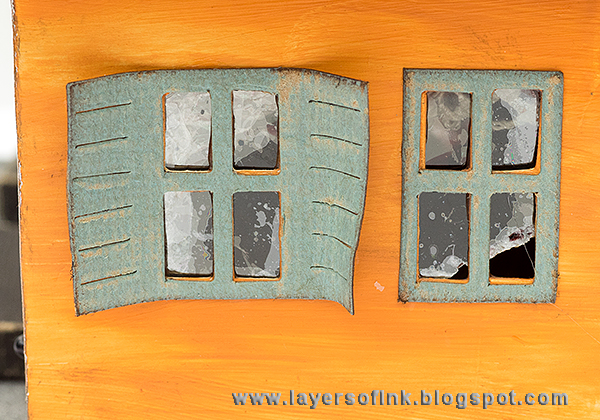
Some of the mice pieces were slightly too small for the windows. Then I like to make it look as if the window is a little broken.
I placed a shutter on each side of the orange house and didn't mind mixing them with ordinary frames. You could also use only shutters.
By combining the various details on all the village dies, you can create a large number of different types of houses. These houses can easily be customized by using different colours, or making them for a specific season.
Thank you so much for stopping by today!!
Happy Crafting!
Anna-Karin
Supplies:
Additional supplies:
Mica: US ArtQuest


I love your little houses Anna-Karin! Thanks for including your inspiration photo - how picturesque Old Town is!
ReplyDeleteThe Old Town is certainly beautiful and I love how you modeled your beautiful mini town to match them - the colours and details are fantastic. I really love that you used mica for the windows (must remember that one). Now I think I need to invest in that die.... xx
ReplyDeleteYour old houses are lovely. Great tutorial, Anna-Karin!
ReplyDeleteOh! Oh! Oh! These are stunning! Such rich colors and I like how you made them look aged. That cracked stamp is fabulous to show they are old. And the doors and windows! You have given these such personality and it looks like they would fit right into your photo of Old Town. Love them.
ReplyDeleteLove your houses, especially the colors you chose and the little details. I'm partial to houses myself!
ReplyDeleteLove these!! And they look just like your inspiration - fabulous! xx Lynn
ReplyDeletelove, LoVe, LOVE each and every one of these!! So many creative details and work; appreciate your sharing them with us :-)
ReplyDeleteOh la la!Wonderfull little houses!Bravo!And thank you for the tutorial!
ReplyDelete